How to Measure a Toilet Rough-In
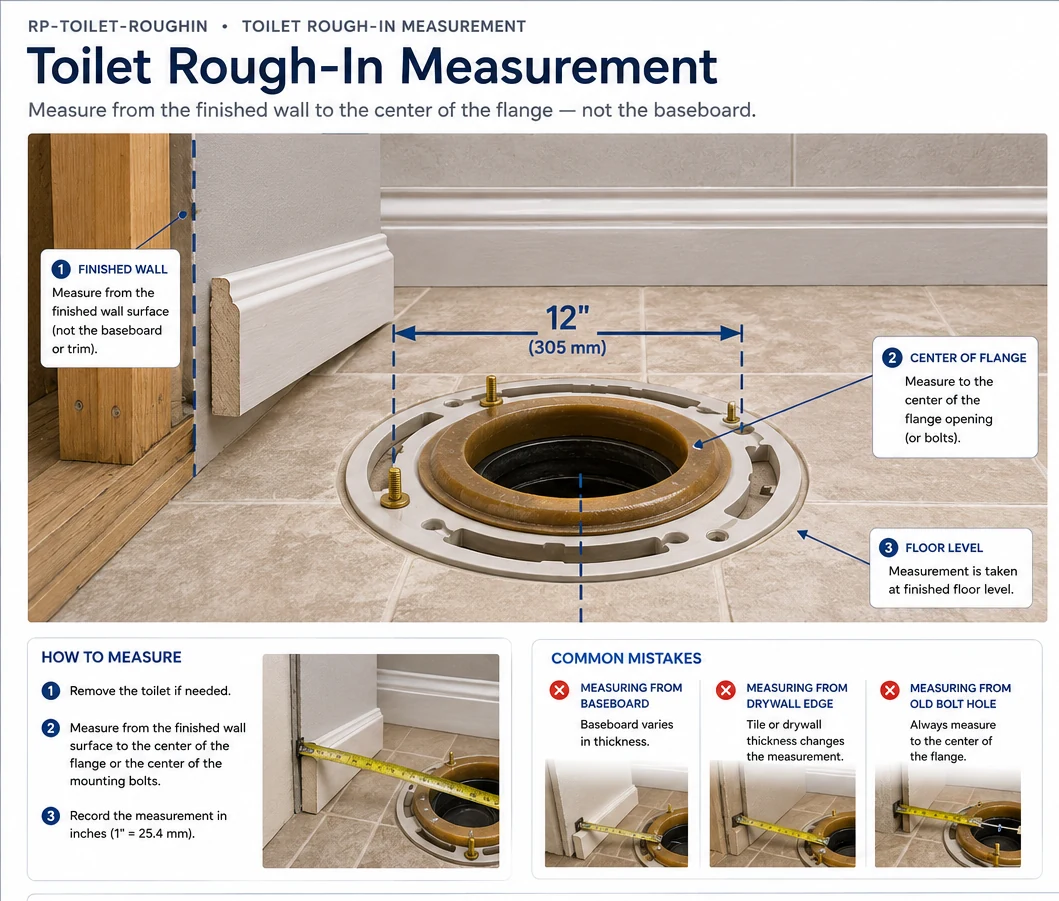
A toilet rough-in is normally checked from the finished wall behind the toilet to the centre of the toilet flange or closet bolts. Baseboard and decorative trim can mislead the measurement.
TYPICAL MEASUREMENT CONCEPT — verify the actual toilet, finished wall condition and manufacturer requirements.
What You’re Looking At
Measure toilet rough-in from the finished wall to the flange or closet-bolt centre before buying a replacement toilet.
How It Works
How to Measure Toilet Rough-In is shown as part of the larger plumbing path so a homeowner can see what connects before and after it. Use the visual to identify the component/system relationship first, then use symptoms and timing to narrow the problem.
Common Symptoms
- Unexpected leakage, noise, odor, slow flow/drainage, poor performance or visible deterioration
- A symptom that changes when a related fixture or valve is operated
Common Causes
- Wear, restriction, poor adjustment, failed sealing, incorrect layout or a downstream/upstream system issue
- A nearby component creating a symptom that appears to come from this part
Common Mistakes
- Replacing a part before confirming the failure path
- Changing piping before checking the surrounding system relationship
- Treating a simplified visual as a jurisdiction-specific installation drawing
What the Visual Shows
- Use the finished wall as the measurement reference
- Do not start the tape at the baseboard or decorative trim
- Measure to the centreline of the flange/closet-bolt location
- Check the selected toilet's manufacturer rough-in specification before purchase
What You Can Check
- Measure after accounting for permanent wall finishes
- Measure to the centre of a closet bolt when the installed toilet hides the flange
- Recheck if tile, wainscot or another finish will be added behind the toilet
Safety & Scope
Local plumbing codes and manufacturer instructions apply. Shut off water/energy where required and escalate concealed, sewage, structural, gas, electrical or uncontrolled-leak conditions. Dimensions and acceptable configurations can vary by fixture, manufacturer and jurisdiction. Verify the specific product instructions and local requirements before installation.
When to Call a Plumber
Call a qualified plumber when the problem involves concealed piping, sewage, uncontrolled leakage, structural work, water-heater safety devices, uncertain code requirements, or multiple fixtures/system branches.