Shower Valve on an Exterior Wall | RoughPlumb
Understand cold-climate freeze and service-access concerns before choosing the wall.
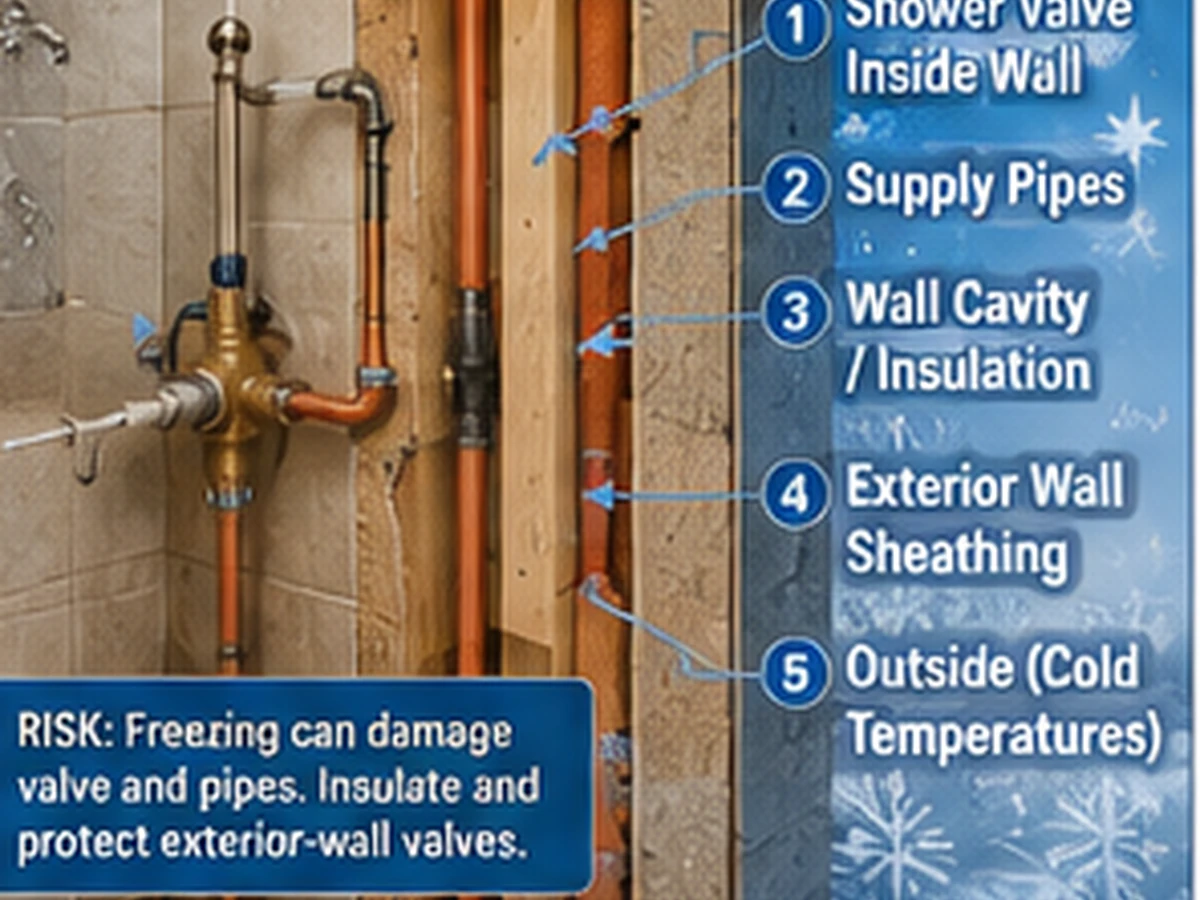
What You’re Looking At
Understand cold-climate freeze and service-access concerns before choosing the wall.
How It Works
Shower Valve on an Exterior Wall is shown as part of the larger plumbing path so a homeowner can see what connects before and after it. Use the visual to identify the component/system relationship first, then use symptoms and timing to narrow the problem.
Common Symptoms
- Unexpected leakage, noise, odor, slow flow/drainage, poor performance or visible deterioration
- A symptom that changes when a related fixture or valve is operated
Common Causes
- Wear, restriction, poor adjustment, failed sealing, incorrect layout or a downstream/upstream system issue
- A nearby component creating a symptom that appears to come from this part
Common Mistakes
- Replacing a part before confirming the failure path
- Changing piping before checking the surrounding system relationship
- Treating a simplified visual as a jurisdiction-specific installation drawing
What the Visual Shows
- Interior shower valve
- Exterior sheathing
- Insulation/cold-zone relationship
- Service-access direction
What You Can Check
- Identify the climate exposure of the wall
- Determine whether piping can remain on the warm side of insulation
- Prefer an interior wall when practical
- Check local construction/plumbing requirements before finalizing
Safety & Scope
Local plumbing codes and manufacturer instructions apply. Shut off water/energy where required and escalate concealed, sewage, structural, gas, electrical or uncontrolled-leak conditions.
When to Call a Plumber
Call a qualified plumber when the problem involves concealed piping, sewage, uncontrolled leakage, structural work, water-heater safety devices, uncertain code requirements, or multiple fixtures/system branches.